If you run a fleet, the same pre-trip inspection gets filled out on every vehicle, every day. The part that's usually tedious isn't the checklist — it's making sure the driver is looking at their truck's record, not the one three vehicles down the lot that someone filled in from memory.
QR stickers solve that by doing the one thing a driver shouldn't have to: typing in which vehicle this is. Scan the sticker on the dash, and the checklist already knows.
What you need first
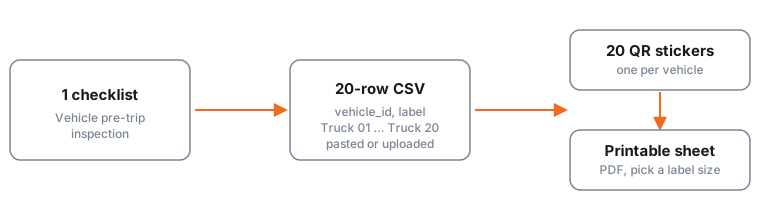
Start from a checklist — the built-in Vehicle pre-trip inspection (US) template is a good base, or build your own. Either way, add one short-text field for the vehicle, something like Vehicle ID. That's the field a sticker will prefill; without it, a sticker has nothing of the vehicle's own to carry.
Build the CSV
Open the checklist, then QR stickers in the side panel. You'll paste or upload rows — one per vehicle — with a column for every field you want prefilled, plus a label column for the text printed on the sticker itself:
vehicle_id,label
Truck 01,Truck 01
Truck 02,Truck 02
...
Truck 20,Truck 20
For 20 trucks that's 20 rows. (The limit per batch is 500, so a much bigger fleet is one paste away too.) Paste it in and you'll get a preview — any row with a typo or a column that doesn't match a real field on the checklist is flagged before anything is created, so you fix it once instead of mid-print-run.
Create and print
Once the preview is clean, create the batch. Each row becomes its own QR sticker, independently revocable later if a truck is sold or a code gets damaged. Download the printable sheet as a PDF, pick the label size your printer stock uses, and print.
Stick one per truck — dash, door, wherever a driver will see it before they start the inspection.
What the driver sees
Scan the sticker, and the checklist opens with Vehicle ID already filled in with that truck's value. The driver fills in the rest — tires, lights, fluids, odometer — and submits. No typing the vehicle number, no guessing which record they were supposed to be on.
Every submission is timestamped and tied to the sticker it came from, so if a truck's inspections start looking thin, you know exactly which vehicle to go check on.
This walkthrough uses the built-in vehicle pre-trip inspection as the base checklist — see the full set of templates for other starting points, fleet or otherwise.